Share this
by Jon Ferraez on Feb 3, 2015 8:20:16 AM
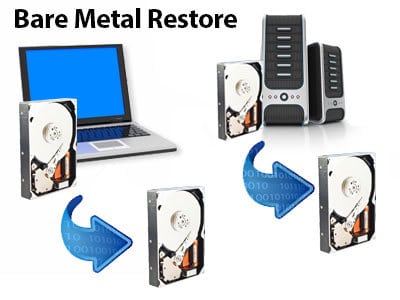 A bare metal restore refers to a technique used to restore an entire system (applications, OS, files) to a blank or "bare metal" hard drive that is free of any applications or operating system. A bare metal restore is often performed by using a disaster recovery image backup created with backup software. For a more thorough explanation, I would recommend reading our post on What is a Bare Metal Restore?
In most cases, when you run into a scenario where bare metal restore is needed, it's due to some catastrophic event, like a hard drive crash, which wipes out your entire hard drive. When this happens, most users either purchase a new hard drive or just opt to replace the server or PC. Either way, the replacement hard drive is often larger than the existing hard drive, making a bare metal restore no issue. But what happens when that is not the case and your replacement hard drive is actually smaller than your existing hard drive. Can you do a bare metal restore to a smaller replacement hard drive or are you just out of luck?
There are several scenarios I can think of when you might opt for using a smaller replacement hard drive. For instance, you may have an older hard drive lying around that could save you in a pinch until you are able to purchase a replacement hard drive. Or alternatively, you may have opted to switch from a hard disk drive to a smaller SSD drive. Either way, when you face these scenarios, you need to know that you can, using some backup software solutions, still do a bare metal restore.
This article is designed to help you navigate how to go about using a bare metal Disaster Recovery image (DR image) created with NovaBACKUP software to restore that image to a smaller hard drive. Since this is not a common use-case, it requires a little more manual effort, but it can be done.
Bare Metal Restore to Smaller Drive
Let's say for example that the original hard drive you used to create your DR image was a Western Digital 250GB hard drive (non-SSD) and you have now purchased a 120GB SSD hard drive to replace it, but the SSD hard drive is half the size of your existing WD 250GB hard drive. In order do a bare metal restore in this scenario, you would need to manually create the partitions on the destination 120GB SSD hard drive yourself prior to attempting a DR restore. Currently there is no function or method to manually create those partitions properly from within NovaBACKUP, so read on to find out how to do that.
In our example, the smaller replacement drive is a 120GB SSD drive, so say for instance you are utilizing 60GB of your original larger 250GB hard drive for your DR image that you now want to restore. Then, as long as you have 119GB of used disk space on the WD 250GB hard drive, this can be done. Let me explain how.
In order to restore your DR image to your smaller hard drive, you will need to manually create the same partition table on the new replacement smaller hard drive as your existing larger hard drive. There are a few ways to do this including the built in Disk Management tool in Windows by booting into Windows from your current Western Digital 250GB hard drive to create the same partition structure that you have in place on this hard drive to the 120GB SSD, you can have the new SSD hard drive connected and perform a Windows 7 installation on to that drive, which will create the necessary partition table, or you can use a 3rd party boot-able partition manager tool.
Creating a Partition Using Windows Built-in Tool
To create the partitions on the 120 GB SSD manually including the boot partition, (this is usually about 100MB to 350MB in size and labeled as "System Reserved") and the C: drive partition manually using the Widows built-in tool, go to the Administrative Tools > Computer Management > Disk Management application which exists in modern editions of Windows or a freeware 3rd party partition manager application. Create the boot partition first, at the same size or slightly larger than your existing boot partition that is on your WD 250GB hard drive. It would need to be the same size or larger than the one that already exists on the WD 250GB hard drive to work. You do not need to format the partitions, just create the partition table, i.e. two partitions, one boot partition first and then the C: drive to take all of the remainder of the free physical disk space (such as 119GB).
You will first probably want to disconnect the WD 250GB hard drive to not mistakenly overwrite or mess it up.
Connect the new 120GB SSD drive with all of the partitions created as you need them to be.
Then boot up the DR Boot Disc. When you go to restore the image you will browse first to the storage location where the .NDF file, the Full DR image exists, and then when you get the choice of what partition to restore, select the individual boot partition that is stored inside the Full .NDF DR Image as the small volume (usually around 100MB to 300MB in volume size and labeled as "System Reserved"), do not select the entire "Disk 0" or "Disk 1" but the one individual partition and then on the next screen you will have the chance to select the replacement hard drive to restore that one boot partition to. In your case that will be your 120GB SSD hard drive, select the small first partition that you already created manually in the earlier step and restore that partition individually.
Next, in a second operation without restarting your PC, you will be able to restore the C: drive volume in the Full DR image (.NDF) to then point to the second partition that you manually created on the new SSD hard drive. You will do this by selecting that partition individually from the image and then on the screen after that you can select where to restore the second partition that you manually created on the new SSD hard drive to restore to and restore that partition.
The good news is, if you find yourself in this situation, NovaStor is here to help. All of our Server or higher products include NovaCare premium technical support, so you don't ever have to face a disaster recovery situation alone. Our in-house technical support staff are here to help you with this or any other uncommon use-case you may experience.